Wax your Snowboard or Ski easily by yourself! Follow our step by step guide you can wax your own gear before you go snowboarding next. Waxing a snowboard or skis is easy and only takes just over an hour.
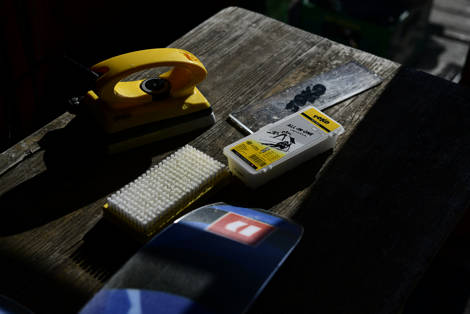
What you’ll need:
- A well ventilated room
- A stable work bench
- An old sheet to protect bench from wax
- Board grips to keep Snowboard stable
- An old rag to clean base
- Base cleaner
- A waxing iron
- Snowboard or ski wax
- A plexiglass snowboard or ski scraper
- Brushes
- Your Snowboard / Ski
How to wax your snowboard - step-by-step guide:
How to wax your skis - step-by-step guide:
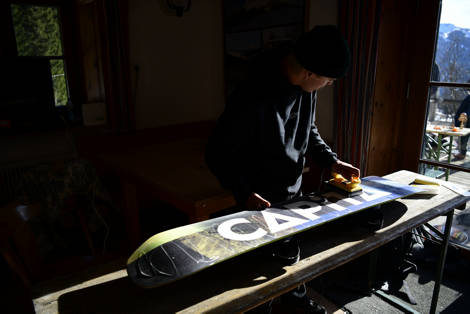
Setup your work area
Cover any surfaces which you don't want to get waxy with an old sheet. Secure your snowboard grips either end of your board, past the bindings. Loosen or remove bindings to allow the board to flex whilst being scraped.
Clean the Base
Use an old rag with some snowboard cleaning fluid to wipe any dirt from the base. Make sure the snowboard is clean, particularly in spring. If the base is dirty it will not absorb wax very well.
Switch on waxing iron
The correct temperature for your wax should be on the packaging, adjust the temperature of the Iron. Be careful! Waxing irons heat up very quickly!
Choose your wax
Wax is available for all kinds of conditions. From wax for the really cold snow, ideally champagne powder, to special mixtures for the slushy spring-shred-days. The manufacturers usually indicate on the wax packaging, which temperatures the formula is made for. They usually do that by indicating the snow temperatures the wax should be used for. Wax for cold snow is usually depicted as -10 to -30°C, while "warm" or slushy snow temperatures range from 0 to - 6°C. If you are not sure what the conditions are going to be like or just want to be ready for anything, use a universal or "all temp(eratures)" wax!
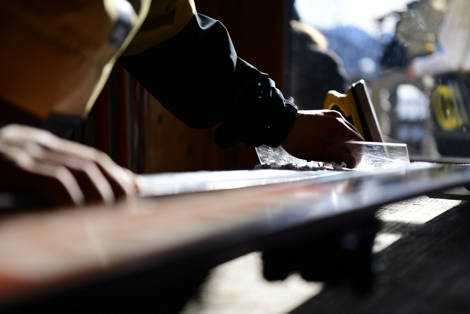
Apply wax to the Snowboard
Press the wax against the waxing iron until the wax begins to drip onto the surface of the board. Drip wax around the edge of the board then zig-zag down the centre. Be liberal with the amount of wax you use, you can’t really use too much. Be careful! If you see the iron smoking it is burning and rather than melting the wax, turn your iron down
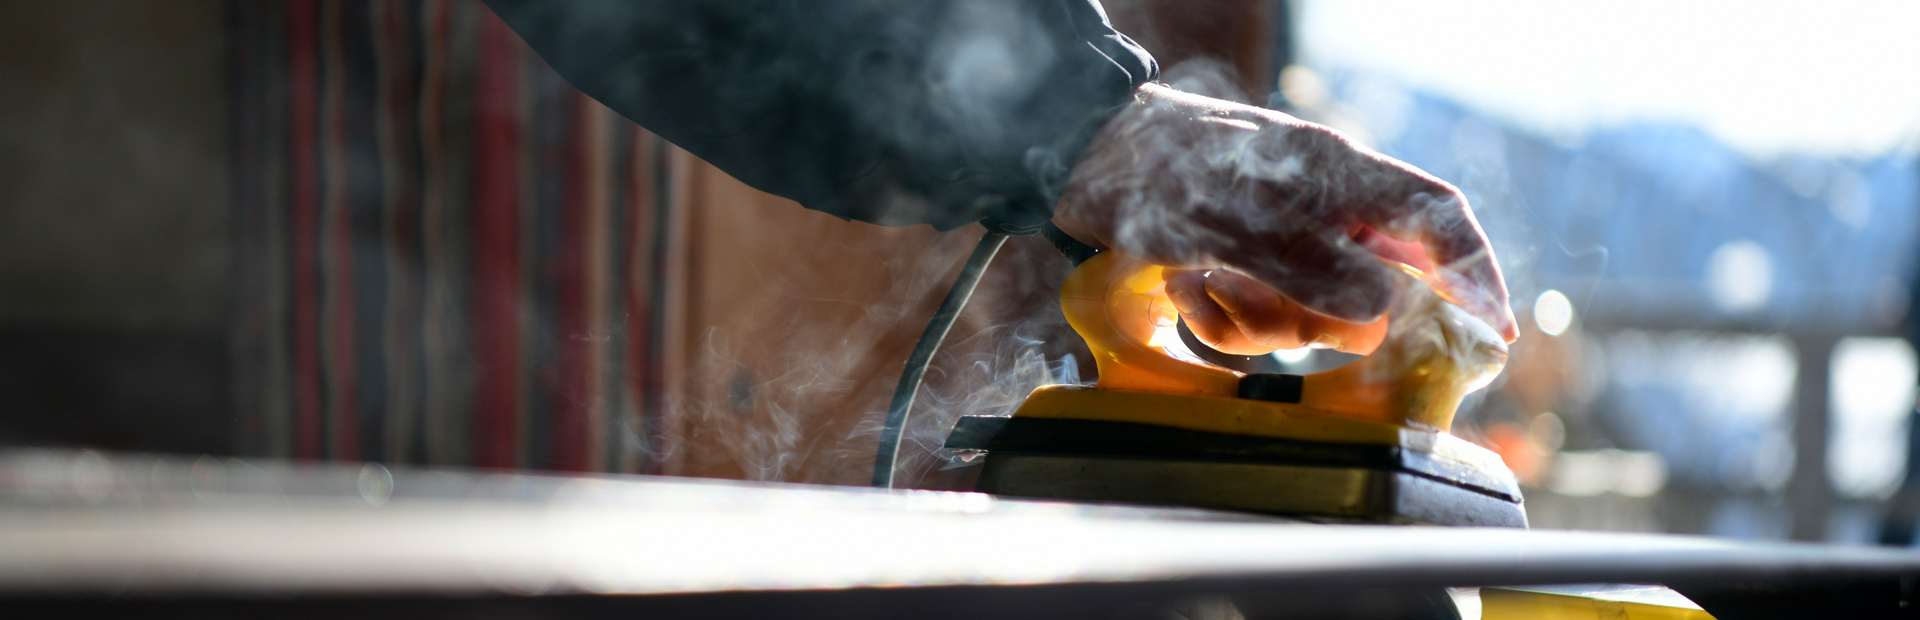
Use the iron to melt wax into the base
Run the hot surface of the iron flat to the bottom of the board and spread the wax in a thin layer evenly over the base. Be careful! Keep the waxing iron moving at all times, so the Ptex doesn’t burn. Your snowboard topsheet should be warm to the touch, no hotter. Don’t touch the edges!
Leave snowboard to rest
After waxing, you will need to leave your board for at least 30 minutes, ideally even longer. If you don’t let the wax soak in the base will not properly absorb the wax and it will not run as fast or as long on snow.
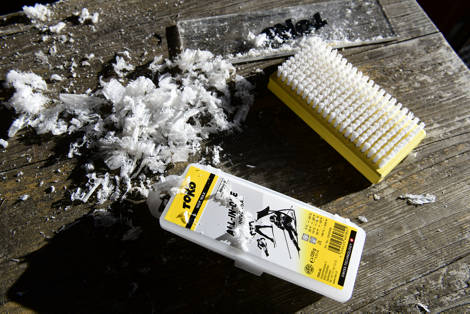
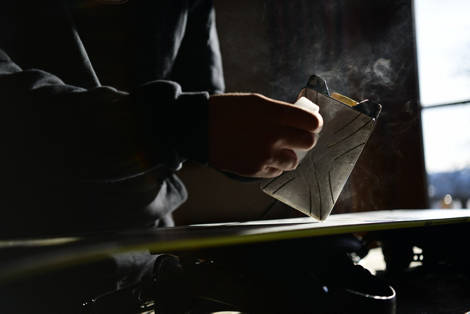
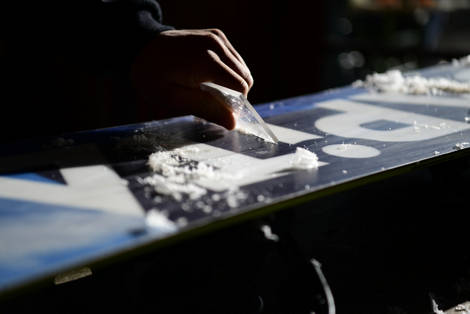
Scrape Wax off snowboard!
Using your scraper with two hands with a strong grip scrape the wax from the base. Try to use long motions, hold the scraper hard against the base. Don’t worry you can’t scrape too much wax off!
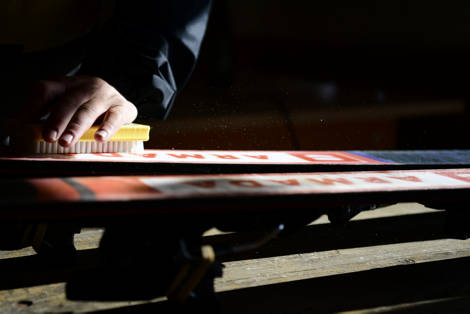
Brush your base down
Brush from tip to tail of the board, use medium to long strokes. Do this until no more white dust comes out of your base. Stiffer brushes will take more material from around the structure of your snowboard, softer brushes will just polish more. Put your back into it!